课程链接:three.js journey
前年买了一门课,去年断断续续学了一两个月,搁置了5个月,今年继续学。 先复习之前的课记个笔记。
没有追求写得很通顺,中英胡乱混合ing
其他几篇:
- Notes 2 - Classic Techniques
- Notes 3 - Advanced Techniques Part1
- Notes 4 - Advanced Techniques Part2
- Notes 5 - Advanced Techniques Part3
why use Three.js
WebGL (Web Graphics Library) is a JavaScript API for rendering high-performance interactive 3D and 2D graphics within any compatible web browser without the use of plug-ins.
WebGL 是用的 GPU 来绘制的,GPU 有很多 parallel workers,所以很快。 怎么放置 points 每个 pixel 如何画都是在 shaders 里定义的。(shader 是个挺重要的概念,之后再好好了解)
但是 native WebGL too hard,手写 WebGL 还是比较痛苦比较麻烦的一件事(老师举例,画一个简单的三角形就需要写 100 行代码), 所以 three.js 应运而生。
4 Basics elements
- A scene that will contain objects, 对应
THREE.Scene - Some objects, can be many things like primitive geometrics, imported models, particles, lights, etc.
- 常用的 Mesh - combination of a geometry (the shape) and a material (how it looks)
- threejs 有一系列 Geometry class 对应各种形状,另一系列 Materials 就是对应样子等
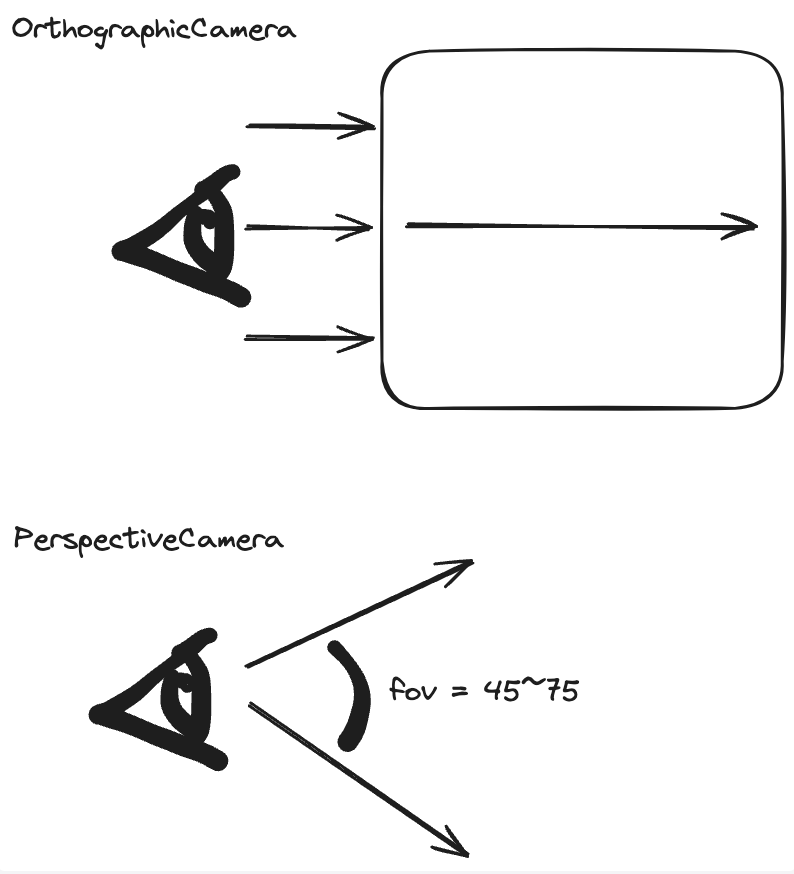
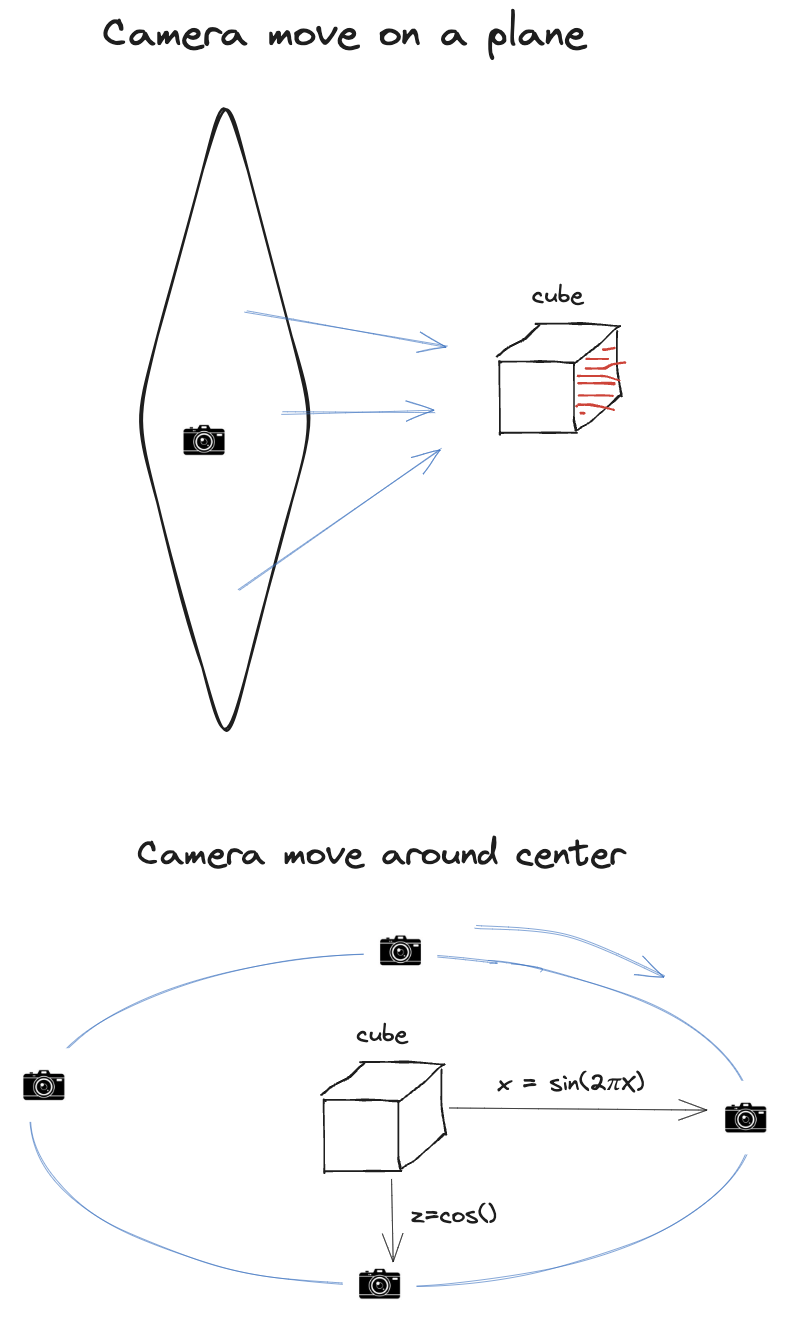
Camera- camera 不可见,只是一种理论上的 point of view。render 的时候就是从 camera 的视角出发去做
- 也可以有多台camera,像是拍电影一样,在 cameras 中间切换视角
- threejs 也有几种不同的 camera 可以选择,basic 选用
PerspectiveCamera - field of view: how large your vision angle is, unit in degrees and corresponds to the vertical vision angle
Renderer,顾名思义就是做渲染工作的,它会将当下的 scene 从 camera 的视角出发,将结果画在一张画布上
import * as THREE from 'three';

// Scene
const scene = new THREE.Scene();
// Mesh
const geometry = new THREE.BoxGeometry(1, 1, 1); // cube: width, height, depth
const material = new THREE.MeshBasicMaterial({ color: 0xff0000 }); // red, using hex
const mesh = new THREE.Mesh(geometry, material);
scene.add(mesh); // need to add to scene

const sizes = {
  width: 800,
  height: 600,
};
// Camera
// 75 - field of view, 5的角度在实际情况来说可能太大。但对初学者来说,比较合适,不会跟丢 objects。多数 website, around 35
// width / height - aspect ratio,画布的宽高比
const camera = new THREE.PerspectiveCamera(75, sizes.width / sizes.height);
// camera.position.x = 1
// camera.position.y = 1
camera.position.z = 3; // by default, everything is at the center, so need to move camera backwards to be able to see objects
scene.add(camera);

// Canvas,<canvas class="webgl"></canvas>
const canvas = document.querySelector('canvas.webgl')
// Renderer
const renderer = new THREE.WebGLRenderer({
  canvas: canvas
});
renderer.setSize(sizes.width, sizes.height);
renderer.render(scene, camera); // 这一步才会在网页上看到渲染的效果
Animations
前面的例子里 render 只是一个静态的结果,想要让 3D 能动起来或者可以交互,需要使用 window.requestAnimationFrame 持续进行 render
fps = frames per seconds
let time = Date.now()

const tick = () => {
	// Time
	const currentTime = Date.now()
	const deltaTime = currentTime - time // around 16-17 milliseconds
	time = currentTime
	// update objects
  // 用 delta 是来fix 时间,rotation 速度就和 frame rate 不相关,在任何 frame rate 都保持相同速度
	mesh.rotation.y += 0.002 * deltaTime // rotate the object
	// render part
	renderer.render(scene, camera);
	window.requestAnimationFrame(tick) // will repeated being called
}

tick()
Camera
THREE.Camerais abstract class, not supposed to being used directlyTHREE.ArrayCamerafrom multiple cameras on a specific areas of renderTHREE.StereoCamerarender through 2 cameras that mimic eyes to create a parallax effect, 3D VR likeTHREE.CubeCamerado 6 renders, surroundings like environment map, reflection or shadow mapTHREE.OrthographicCamerarender the scene without perspective, RTS game, object size is always the same, no matter far or near- parameters: left, right, top, bottom; 像是设置一个 box square,方形前进这样
- cube looks flat
THREE.PerspectiveCamera最常用的- field of view,实际上人类的视觉角度是 huge,但是在这里不能设置太大。比如设置成 140 degree 的话,objects 会看上去很小,以及 distorted(严重变形)。原因是我们一般在网页里是 render in a rectangle area,会需要将 amplified render squeeze 到一个方形里。老师推荐 45-75 fov
- aspect ratio,width/height of render
- near / far: objects closer than near or further than far will not show up,camera can see 的距离区间
- 如果 far 设置小于 camera 的 distance,objects 就会看不见或者部分看不见
- 但是不要使用 extreme values like 0.0001 and 9999999 to prevent z-fighting
- 0.1 可以,具体取决于project
Geometries
What:
- composed of vertices (point coordinates) and faces (triangles that join vertices to create surface)
- can be used for meshed and particles
- can store more data than positions
All inherited from BufferGeometry.
The BoxGeometry has 6 parameters:
width: The size on thexaxisheight: The size on theyaxisdepth: The size on thezaxiswidthSegments: How many subdivisions in thexaxisheightSegments: How many subdivisions in theyaxisdepthSegments: How many subdivisions in thezaxis
segments 在需要精细化每个点的时候会用到,设置 material 的时候带上 wireframe: true 就可以看到 triangles segments.
How to create your own buffer geometry
To add vertices to a BufferGeometry you must start with a Float32Array. Float32Array are native JavaScript typed array. You can only store floats inside, and the length of that array is fixed.
// Create an empty BufferGeometry
const geometry = new THREE.BufferGeometry()
// init Float32Array
const positionsArray = new Float32Array([
    0, 0, 0, // First vertex
    0, 1, 0, // Second vertex
    1, 0, 0  // Third vertex
])
// convert Float32Array to BufferAttribute
// 3 means how much values compose one vertex
const positionsAttribute = new THREE.BufferAttribute(positionsArray, 3)
Textures
Textures, as you probably know, are images that will cover the surface of your geometries. Many types of textures can have different effects on the appearance of your geometry. It’s not just about the color.
Texture types
mostly used types:
- color
- alpha
- grayscale image
- white visible, black not visible
- height (or Displacement) 使表面不平?
- grayscale image
- move the vertices to create some relief
- need enough subdivision
- normal
- add small details
- doesn’t need subdivision
- the vertices won’t move
- lure(诱骗诱使) the light about the face orientation
- better performances than adding a height texture with a lot if subdivision
- ambient occlusion
- grayscale image
- add fake shadows in the surface’s crevices(裂缝)
- 不一定准确,但是能造出 contrast
- metalness 金属质感
- grayscale
- white is metallic, black is not
- mostly for reflection
- roughness 粗糙度
- grayscale
- in duo with the metalness
- white is rough
- black is smooth
- mostly for light dissipation(消散)
- 举例来说,比如地毯非常粗糙,所以基本看不到光线反射,但水面就很光滑,肯定需要有光线反射效果
PBR principle (especially the metalness and the roughness):
- physical based rendering
- follow real-life directions to get realistic results
- reading:
Load Texture
主要就是使用 TextureLoader,然后设置在 material 上即可看到效果。
const textureLoader = new THREE.TextureLoader()
const texture = textureLoader.load('/textures/door/color.jpg')
texture.colorSpace = THREE.SRGBColorSpace

const material = new THREE.MeshBasicMaterial( { map:texture } );
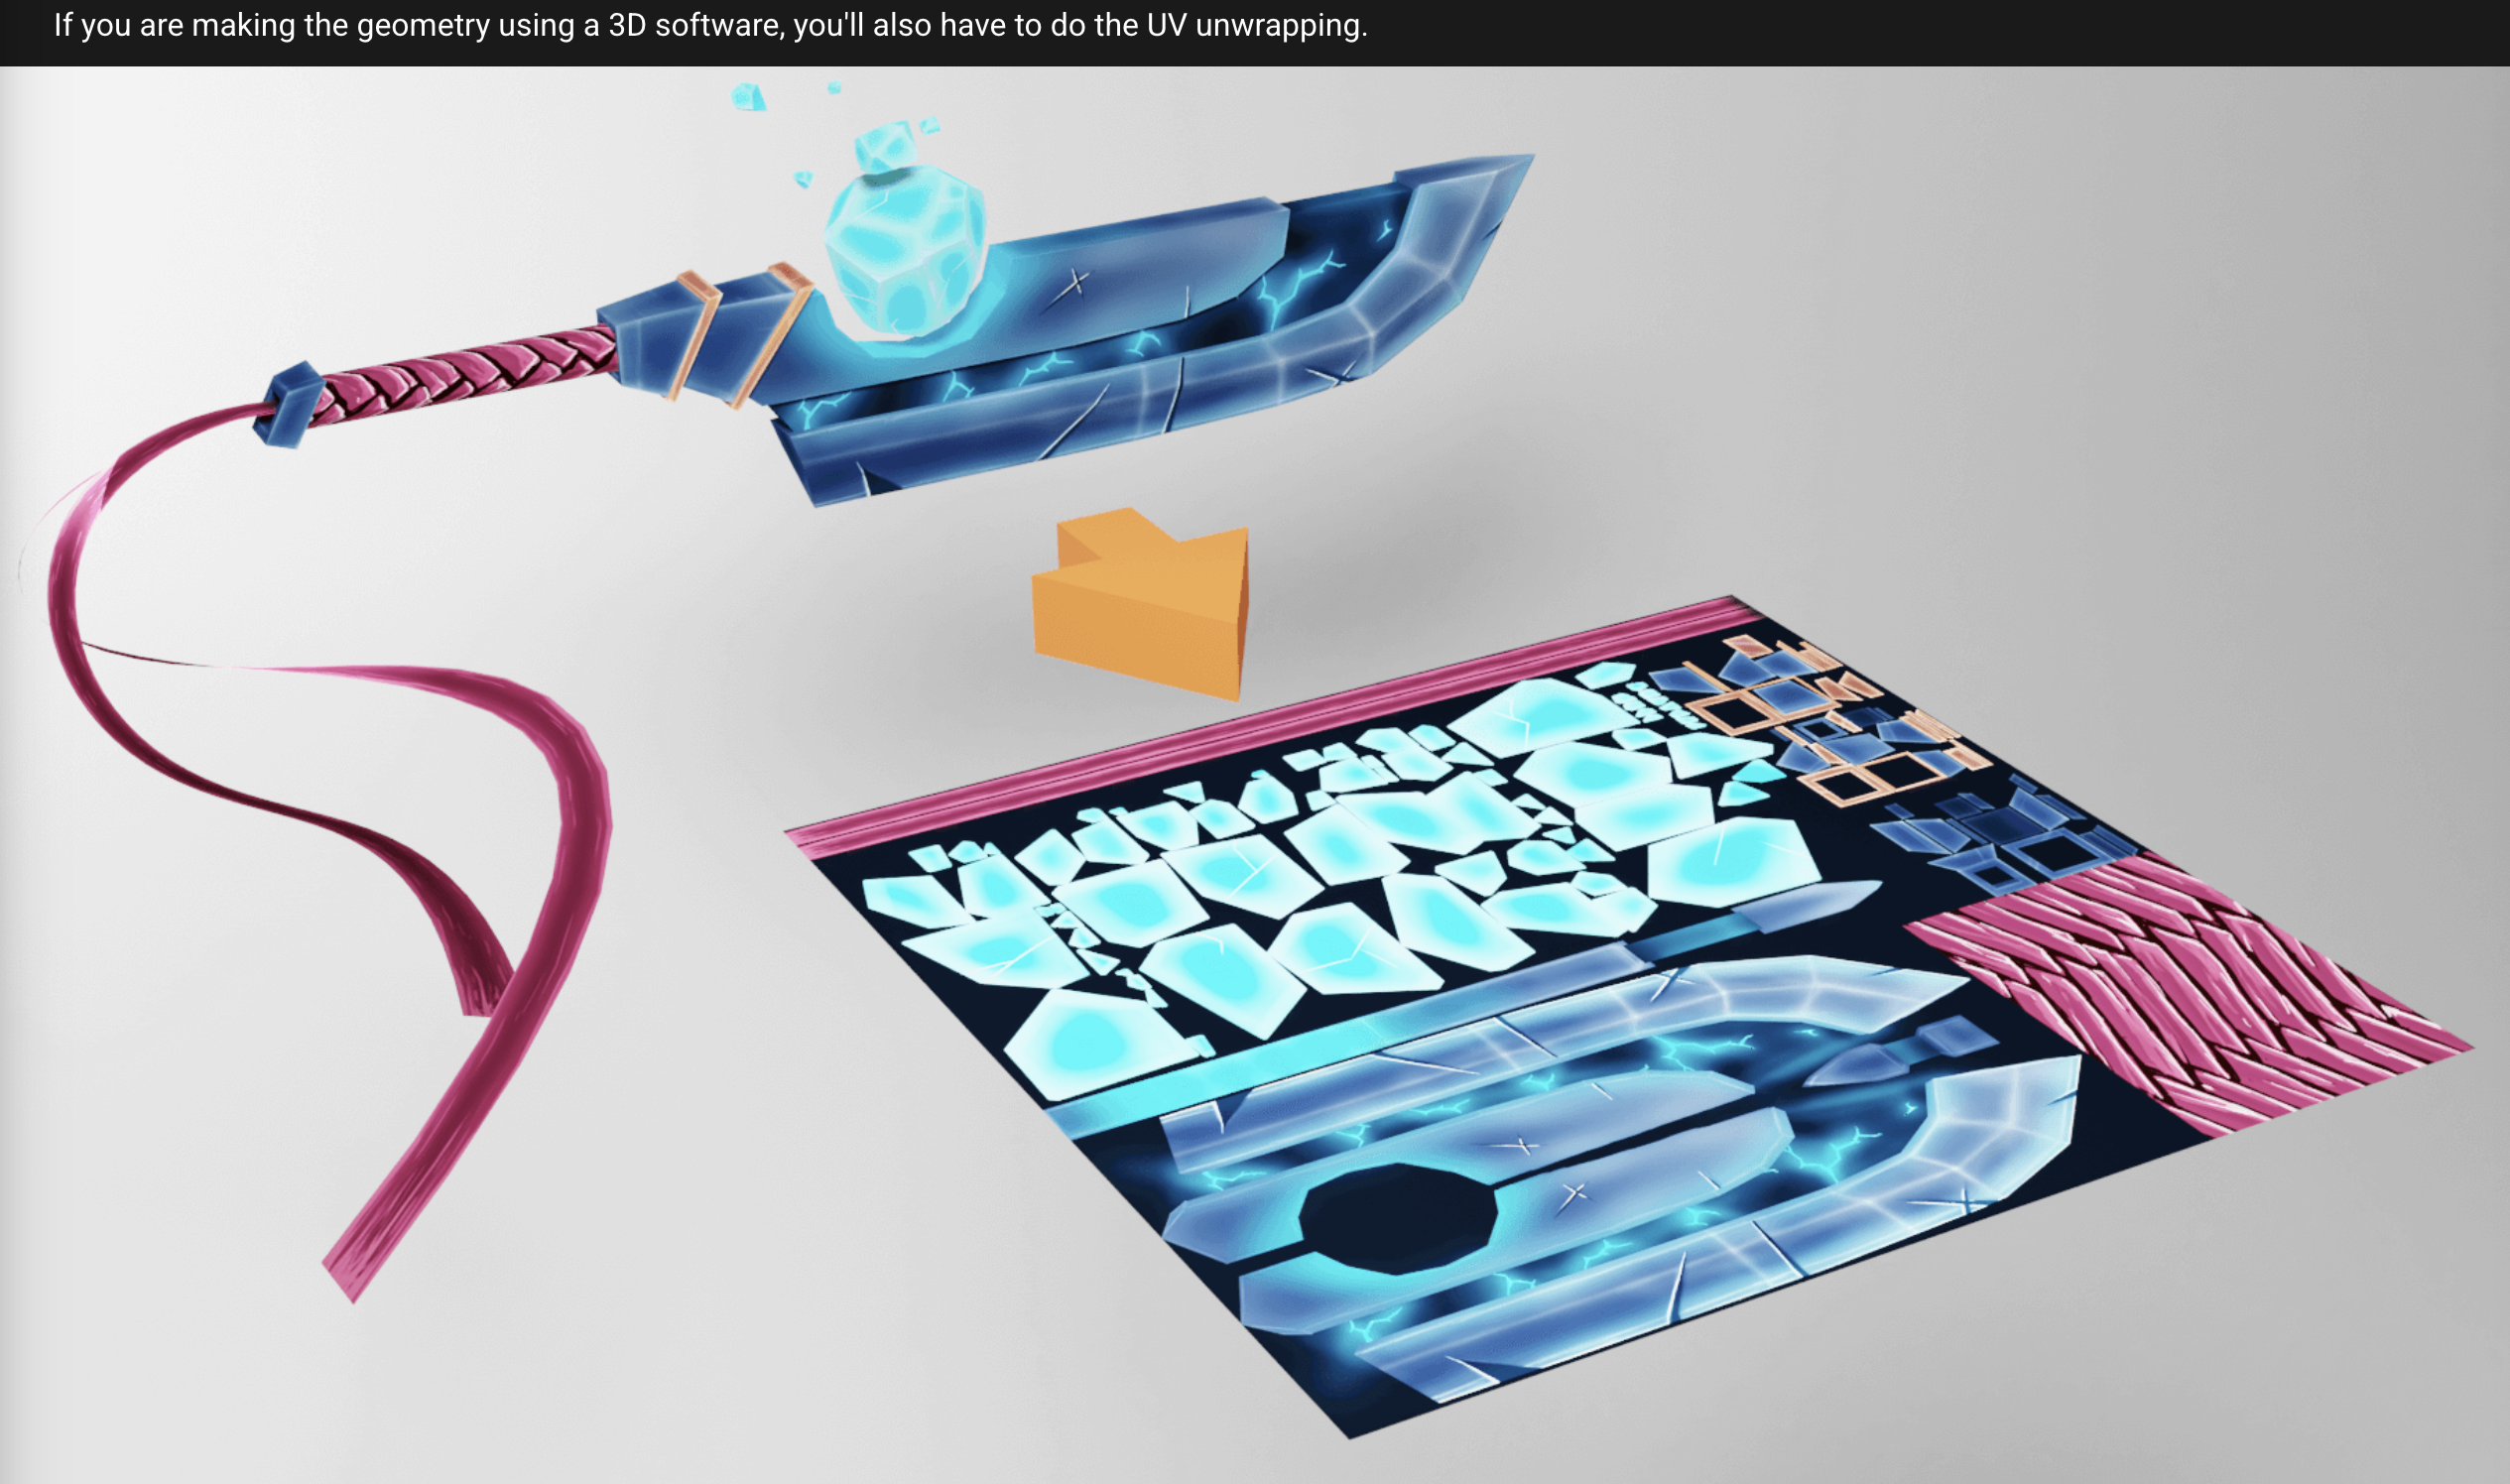
UV unwrapping
texture is being stretched or squeezed in different ways to cover the geometry.
That is called UV unwrapping. You can imagine that like unwrapping an origami or a candy wrap to make it flat. Each vertex will have a 2D coordinate on a flat (usually square) plane.
也就是不同形状的物体在使用 texture 的时候都是先将其 uv unwrapping 成一张平面,再去按照一定的规则进行平铺等。
unwrapping 出来的平面就会有各个点的 uv 2D coordinates(geometry.attributes.uv)。
如果是自己创作新的 geometry,就会需要自行设置 uv coordinates。
// repeat: 2D vector
colorTexture.repeat.x = 2
colorTexture.repeat.y = 3
// texture not being set up to repeat itself by default. To change that, you have to update the wrapS and wrapT properties using the THREE.RepeatWrapping constant.
colorTexture.wrapS = THREE.RepeatWrapping // for x-axis
colorTexture.wrapT = THREE.RepeatWrapping // for y-axis
Filtering and Mipmapping
Mipmapping is a technique that consists of creating half a smaller version of a texture again and again until you get a 1x1 texture. All those texture variations are sent to the GPU, and the GPU will choose the most appropriate version of the texture.
主要是为了处理毛边,blurring
Minification filter happens when the pixels of texture are smaller than the pixels of the render.
当 texture 太大,可以设置 minFilter 使用以下某一个值:
THREE.NearestFilterTHREE.LinearFilterTHREE.NearestMipmapNearestFilterTHREE.NearestMipmapLinearFilterTHREE.LinearMipmapNearestFilterTHREE.LinearMipmapLinearFilter(default)
colorTexture.minFilter = THREE.NearestFilter
当 texture 太小,可以设置 magFilter 使用以下某一个值(magFilter 只有两个可能值):
THREE.NearestFilterTHREE.LinearFilter(default)
colorTexture.magFilter = THREE.NearestFilter
format and optimisation
.jpglossy compression but usually lighter.pnglossless compression but usually heavier- make texture image as small as possible, GPU need to store it, but it has limitation.
- texture resolution better must be a power of 2, 512x512, 1024x1024, 512x2048
- where to find textures:
Material
Material are used to put a color on each visible pixel of the geometries.
The algorithms that decide on the color of each pixel are written in programs called shaders. Writing shaders is one of the most challenging parts of WebGL and Three.js, but don’t worry; Three.js has many built-in materials with pre-made shaders.
MeshBasicMaterial
/**
 * Textures
 */
const textureLoader = new THREE.TextureLoader()

const doorColorTexture = textureLoader.load('./textures/door/color.jpg')
const doorAlphaTexture = textureLoader.load('./textures/door/alpha.jpg')
const doorAmbientOcclusionTexture = textureLoader.load('./textures/door/ambientOcclusion.jpg')
const doorHeightTexture = textureLoader.load('./textures/door/height.jpg')
const doorNormalTexture = textureLoader.load('./textures/door/normal.jpg')
const doorMetalnessTexture = textureLoader.load('./textures/door/metalness.jpg')
const doorRoughnessTexture = textureLoader.load('./textures/door/roughness.jpg')
const matcapTexture = textureLoader.load('./textures/matcaps/1.png')
const gradientTexture = textureLoader.load('./textures/gradients/3.jpg')
doorColorTexture.colorSpace = THREE.SRGBColorSpace
matcapTexture.colorSpace = THREE.SRGBColorSpace


// MeshBasicMaterial
const material = new THREE.MeshBasicMaterial({ map: doorColorTexture })
material.color = new THREE.Color('#ff0000') // 设置material 和 color 不冲突,效果是叠加的
material.wireframe = true;
material.transparent = true;
material.opacity = 0.5; // set opacity should also set transparent=true
material.alphaMap = doorAlphaTexture; // 可以隐藏一部分
material.side = THREE.DoubleSide // default won't be visible on the back side, avoid using DoubleSide whenever possible as it requires more resources
其他几种常用的 Material 课程里都有不少详细介绍
- MeshNormalMaterial
- MeshMatcapMaterial
- appear illuminated, but it’s just an illusion created by the texture, when no light in the scene
- but it will appear all the same regardless of camera orientation
- MeshDepthMaterial
- simply color the geometry in white if it’s close to the camera’s
nearvalue and in black if it’s close to thefarvalue of the camera
- simply color the geometry in white if it’s close to the camera’s
- MeshLambertMaterial
- this material requires light to be seen,比如添加一个氛围灯,AmbientLight
- 加上 light 后会显得 realistic,illumination 效果是真实可信的,不是fake
- most performant material that uses lights
- MeshPhongMaterial
- similar to MeshLambertMaterial, less performant than MeshLambertMaterial
- can control the light reflection with
shininessproperty, the higher the value, the shinier the surface. - can also change the color of the reflection by
specularproperty
- MeshToonMaterial
- similar to the MeshLambertMaterial in terms of properties but with a cartoonish style
- *MeshStandardMaterial
- use PBR, supports light but with a more realistic algorithm and better parameters like roughness and metalness.
- MeshPhysicalMaterial
- extension of the MeshStandardMaterial, providing more advanced physically-based rendering properties
clearcoat, simulate a thin layer of varnish on top of the actual material, 上层有一层像玻璃效果sheen, highlight the material when seen from a narrow angle, 绒毛效果iridescence, an effect where we can see color artifacts like a fuel puddle, soap bubbles, or even LaserDiscs, 彩虹色的反光,比如灯泡的表面transmission, enable light to go through the material,某些透明的材料,比如玻璃制品
- PointsMaterial handle particles
Environment map
Environment map is like an image of what’s surrounding the scene. example picture is found from Poly Haven
// add environment map
import { RGBELoader } from 'three/examples/jsm/loaders/RGBELoader.js'

/**
 * Environment map
 */
const rgbeLoader = new RGBELoader()
rgbeLoader.load('./textures/environmentMap/2k.hdr', (environmentMap) =>
{
    environmentMap.mapping = THREE.EquirectangularReflectionMapping
		// apply the scene
    scene.background = environmentMap
    scene.environment = environmentMap
})